1. How do I know if I have a virus ?
 Do a complete system scan noteing the name and location of the file
If you do not have an anti-virus software, or the virus has disabled it,here is an excellent online virus scan
that is free and can be done live. If you have a pop-up blocker, hold your control key and click link
Click to scan now
Most virus scans will have a removal tool and offer the option to remove or disinfect the file. If you are using software that does not remove or cannot, because the file is actively running see next step.
2. Manual Removal
Windows XP Users
After you have noted the name and location of the infected file, you will have to do what is called a "CleanBoot". This will close all files, and boot with only the necessary files to run the system.
*Be sure to turn OFF system restore before doing a clean boot so that once the virus is removed, it does not restore when a normat boot is done.
How to perform a clean boot in Windows XP
Note You must be logged on as an administrator or a member of the Administrators group to follow these steps. If your computer is connected to a network, network policy settings may also prevent you from follow these steps.
1. Click Start, click Run, type msconfig in the Open box, and then click OK.
2. On the General tab, click Selective Startup, and then clear the Process System.ini File, Process WIn.ini File, and Load Startup Items check boxes. You cannot clear the Use Original Boot.ini check box.
3. On the Services tab, select the Hide All Microsoft Services check box, and then click Disable All.
4. Click OK, and then click Restart to restart your computer.
5. After Windows starts, determine whether the symptoms still occur.
Note Look closely at the General tab to make sure that the check boxes that you cleared are still cleared. Continue to step 6 if none of the check boxes are selected. If the Load System Services check box is the only disabled check box, your computer is not clean-booted. If additional check boxes are disabled and the issue is not resolved, you may require help from the manufacturer of the program that places a check mark back in Msconfig.
If none of the check boxes are selected, and the issue is not resolved, you may have to repeat steps 1 through 5, but you may also have to clear the Load System Services check box on the General tab. This temporarily disables Microsoft services (such as, Networking, Plug and Play, Event Logging, and Error Reporting) and permanently deletes all restore points for the System Restore utility. Do not do this if you want to retain your restore points for System Restore or if you must use a Microsoft service to test the issue.
6. Click Start, click Run, type msconfig in the Open box, and then click OK.
7. On the General tab, select the Process System.ini File check box, click OK, and then click Restart to restart the computer. If the issue continues, the issue is with an entry in your System.ini file. If the issue does not continue, repeat this step for the Process Win.ini File, Load Startup Items, and Load System Services check boxes until the issue occurs. After the issue occurs, the last item that you selected is the item where the issue is occurring.
Note Microsoft strongly recommends that you do not use System Configuration Utility to modify the Boot.ini file on your computer without the direction of a Microsoft support engineer. Doing so may make your computer unusable.
How to start the Windows Installer service
Note The Windows Installer service does not start if you disable Load System Services. To use Windows Installer in this case, you must start the service manually: 1. Click Start, right-click My Computer, and then click Manage.
2. In the left pane, click Services and Applications, and then click Services.
3. In the right pane, right-click Windows Installer, and then click Start.
If you run a Setup program without manually starting the Windows Installer, you may receive the following error message:
The Windows Installer service could not be accessed. Contact your support personnel to verify that the windows Installer service is properly registered.
How to return from a clean boot state
1. Click Start, click Run, type msconfig in the Open box, and then click OK.
2. On the General tab, click Normal Startup - load all device drivers and services.
3. Click OK, and then click Restart when you are prompted to restart your computer.
Once you have done a clean boot, you should search for the cantaminated file and delete it.
Shutdown system and reboot normally.
Re-scan system for infections.
When none are found turn on system restore
Shutdown and reboot normally
A new (clean) restore log will be created
3. Now for the next problem,
Adware, Spyware and Hijacker
I wish there was an easy solution to this, but unfortunately, they are here to stay and will require constant maintenance to keep these guys to a minimum.
I am using (4) four, YES 4, different programs to keep a handle on it, and to understand why, you need to understand the basics behind the removal~detection programs. They are no more than a database that contains the names of all know threats. When told to scan, the program executes a search for all names within their databse. No matter how reputable and conscientious a company is, it would be hard for 1 to keep up with all that are out there. I run 1 actively in the background, and check weekly with the other 3.
*Note Spyware scans should not all be run at the same time, to prevent conflicts
These are my 3 choices
1. Spybot Search & Destroy (Freesare ) Spybot has a resident feature that will run in the
background on startup, for continuous protection. The tools section can be set to prevent
browser hijacking
2. Microsoft has a beta spyware removal tool that is free until the beta expiration
3. ADAWARE SE Personal by Lavasoft is the free version. They also offer a professional vs.
4. Guess whats next.......you got it...... SPAM !!!!
One of the best little spam killers I have found is Spamfighter. It installs in Outlook Express
as a toolbar and is easily configured. The standard vs is free and the pro vs is 29.00
With regular maintenance your browser should stay running smoothly, but just in case you get ahold of a REALLY tough hijacker, there are several ways to reclaim it.
One of the tools I have run across is the registry key that will set your browser back to the default search engine. Right click and save target as to your desktop or my documents (*be sure to hang on to it,its priceless). Double click on the key and it will place the setting right into your registry.
Its that simple.
CUSTOMIZE
Resetting your default Search Engine
*If you are familiar with editing your registry you can also reset your search engine to whatever you want to use
by the following steps:
*BUT BEWARE, be SURE you understand editing the registry and follow the settings exactly
Click Start/Run, type REGEDIT and go to this key:
HKEY_CURRENT_USER\Software\Microsoft\Internet Explorer\Main
In the right hand pane, look for the values Search Page
HKEY_CURRENT_USER\Software\Microsoft\Internet Explorer\SearchURL
Double click Default in the right hand pane and replace the url with the web addy of the search
engine you would like to use i.e.
http://www.google.com/keyword/%s
Finally, go to this nearby key:
HKEY_LOCAL_MACHINE\SOFTWARE\Microsoft\Internet Explorer\Search
In the right hand pane, double click the value SearchAssistant and replace the existing value with this:
http://www.google.com/ie
Exit the registry, and close and reopen Internet Explorer.
Click the Search button on the IE toolbar. You should now see Google, instead of MSN, pop up as your default Internet Explorer search engine.
In the event you would like to restore MSN as your default search engine, simply go to your IE Tools menu and click on Internet Options, then the Programs tab, and click on the Reset Web Settings button. Close and reopen Internet Explorer to see your change.
**In Windows XP and IE6, you need to disable the Search Assistant to make the change take effect. At the registray key:
HKEY_CURRENT_USER\Software\Microsoft\Internet Explorer\Main
...change the Use Search Asstistant value to No.
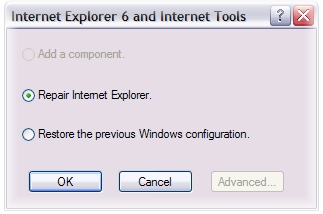
If you’re still encountering major problems with Internet Explorer it may be necessary to perform a repair installation. Click Start, Settings, Control Panel, Add/Remove Programs. Double click Microsoft Internet Explorer 6 and Internet Tools.
Select Repair Internet Explorer and hit Ok. This will fix any detected errors in your Internet Explorer installation. Reboot for the changes to take effect. If you are using Windows XP instructions for performing a repair can be found here
DIOGNISTICS AND MAINTENANCE
Once we have our biggest headaches taken care of, lets look at cleaning up after the fiasco and optimize the system.
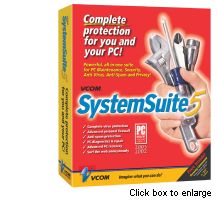
I have been using this product for about 8 years and it hasnt failed me yet. System Suite is a complete
suite of tools to keep your operating system in excellent condition. It has diognitics, firewall, email scan, registry cleaner, port monitor and possibly more I havent even found yet. System Suite has more than paid for itself, when it comes to fixing and keeping things in top condition.
NOW we've cleaned everything up, optimized our system for speed and GUESS WHAT !
You have a valid internet connection BUT you cant browse the Internet !
I know, your 1st instinct is to panic ! Hang on, get control, there IS help.
We are going to edit the registry again, so remember
Warning If you use Registry Editor incorrectly, you may cause serious problems that may require you to reinstall your operating system. Follow the steps exactly.
Delete your temporary Internet files and cookies. To do this, follow these steps:a. Click Start, point to Settings, and then click Control Panel.
b. Double-click Internet Options.
c. Under Temporary Internet Files, click the Settings button.
d. Click the View Files button.
e. Press CTRL+A to select all files.
f. Press DEL or click the Delete option at the top of the window.
g. Click the Yes button on the dialog box that appears.
h. After all the files are gone, close the window.
i. Click OK two times.
j. Close Control Panel.
Note Before proceeding, remove any firewall, Internet security, or proxy software
View Network properties for multiple instances of the TCP/IP protocol that are bound to the dial-up adapter.
Look for multiple instances of the Winsock files. Rename any file that is not in the appropriate folder unless it is in an AOL folder, C:\Windows\Sysbckup, or C:\Windows\Ws2bakup. The following folders are correct for the Winsock files:
Winsock.dll in C:\Windows
Wsock32.dll, Wsock.vxd, Wsock2.vxd, Ws2_32.dll in C:\Windows\System
The dates and versions of these files should match the version of Windows and the system date for that version, except when Winsock2 or DUN 1.3 have been added to Windows 95. If you find a C:\Windows\Ws2bakup folder, Winsock2 has been installed, and DUN 1.3 is listed in the Add/Remove Programs tool in Control Panel if it is installed.
To rename and replace the Winsock files, follow these steps: a. Click Start point to Find, and then click Files or Folders.
b. In the Named box, type the correct file name (for example, type wsock32.dll, winsock.dll, or wsock.vxd), click your hard disk in the Look in box, and then click Find Now.
c. To rename extra copies of the files, right-click the file, click Rename, and change the file name extension to .old. For example, rename the Wsock32.dll to Wsock32.old.
Note If you receive an error message that a file by that name already exists, type a different file name extension (for example, .zzz). If you receive an error message that the file cannot be renamed because it is in use, restart the computer to a DOS prompt, and then rename the file from DOS.
*These are Microsofts instructions. More simply put, you are renaming your Winsock files and on reboot, Windows will replace the missing files.
If you still experience connection problems remove the following registry keys
and reboot.
HKEY_LOCAL_MACHINE\System\CurrentControlSet\Services\VXD\AFVXD
HKEY_LOCAL_MACHINE\System\CurrentControlSet\Services\VXD\DHCP
HKEY_LOCAL_MACHINE\System\CurrentControlSet\Services\VXD\MSTCP
HKEY_LOCAL_MACHINE\System\CurrentControlSet\Services\VXD\Winsock
HKEY_LOCAL_MACHINE\System\CurrentControlSet\Services\VXD\Winsock2
HKEY_LOCAL_MACHINE\System\CurrentControlSet\Services\Winsock
HKEY_LOCAL_MACHINE\System\CurrentControlSet\Services\WinSock2
HKEY_LOCAL_MACHINE\System\CurrentControlSet\Services\RemoteAccess\Authentication\SMM_Files
To remove and reinstall Dial-Up Networking, follow these steps:
a. Click Start, point to Settings, click Control Panel, and then double-click Add/Remove Programs.
b. On the Windows Setup tab, click Communications, and then click Details.
c. Clear the Dial-Up Networking check box, and then click Yes if you receive a message that Dial-Up Networking is required by other components.
d. Click OK until you are prompted to restart your computer. If you are not prompted to restart your computer, restart it manually.
e. After Windows restarts, repeat steps a. through d., except select the Dial-Up Networking check box in step c.
FINALLY, IT WORKS !
Now its time to make our computer do what it was meant to do, ENJOY IT !
Here are more of my favorite programs. Most free and the ones that aren't have been worth the cost
Graphics editing~awesome program~batch conversions~image resize~much more (Free)
Graphics editing~Its hard to believe this program is (Free)~to0 many features to list~crops-
resize~fade effects~border effects~tons of filters~even has a built in "snap shot screen capture
If you want to give Web Pages a shot this is a "must have".Creates LakeApplets, PageFlips,Image
Fades and more, all for the the sum of, ready for this ? (Free)
While your getting your feet wet with Web Pages, you can look all over and wont find
a better web editor than this one.
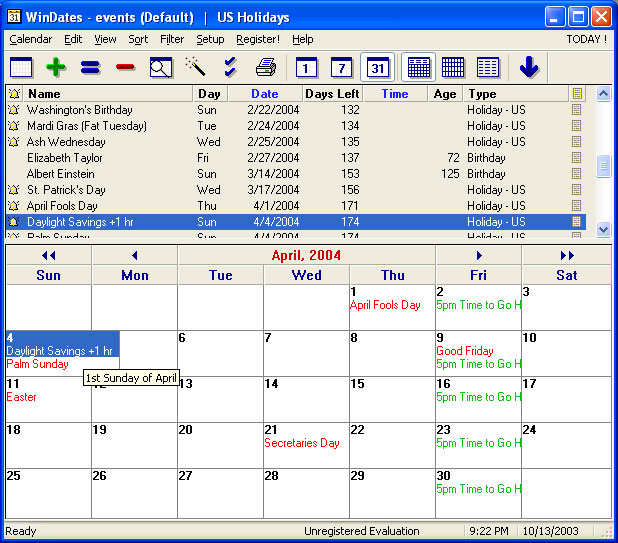
Windates~My favorite calendar program
I hope this information has helped~Check back for future tips and solutions